When I started That Fit Friend, it started as most small businesses inevitably start, as a passionate itch that I needed to scratch. I kept seeing reviews that had no substance, nothing “real” about them.
I kept seeing a landscape of media companies building “reviews” with no real signs of testing, and of course, we have the “reviews” from influencers who weren’t disclosing they were getting paid to say whatever. There are too many reviews written by folks who do not actually test the shoes, then just take photos of them out of the box.
Since its conceptualization, That Fit Friend has grown into a site with countless shoe and apparel reviews. The guiding mission behind That Fit Friend is simple:
“It’s to build quality reviews and content from someone who is buying and using and testing the gear — like a real consumer.”
With every shoe review, I want to make sure I’m putting skin in the game and trying to truly highlight how I’m using, training, and testing a product. I do this with long-form written reviews and videos. I also buy the products I review, so this helps me stay objective.
For the sake of transparency and to shed light on how I physically test the shoes featured on That Fit Friend, I wanted to build out an article explaining my 4-step process for reviewing shoes, so you can better understand everything that goes into my reviews.

Step 1: Break-In Sessions
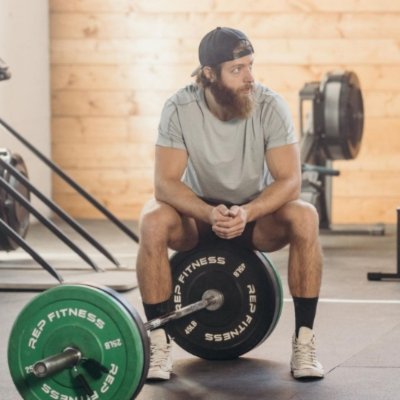
The first step in every shoe review is to break the shoe in with a few strategic training sessions. During these first few sessions, I’ll also take ample notes about the shoe I’m testing.
I find that the first sessions can be great tools for highlighting immediate reactions and thoughts in the context of how a shoe compares to prior iterations and comparable models.
In the context of shoes that have prior iterations, I’ll also typically bring a shoe’s predecessor with me to the gym to rotate so I can gauge and feel differences between the models.

A great example of this would be the Reebok Nano X3. When this cross-training shoe was released, I brought my Reebok Nano X2 with me to the gym for my first three sessions and I wore both models sporadically throughout my workout.
Since I had not yet acclimated to the Reebok Nano X3 or built a bias towards its updates, it’s a lot easier to identify what’s different with this shoe regarding its fit, feel, and initial performance.
During this initial note-taking phase I’m asking multiple questions about the shoe and what I observe,
- How does the shoe fit out of the box?
- Does it feel and fit similarly to its predecessor (if there is one)?
- What updates are the most notable about this shoe?
- Are there any immediate deficits that can be found?
- How long does the break-in process take?
These are only a handful of questions that I’m thinking and considering when initialing wearing a shoe for review. My questions will ebb and flow based on the iteration of the model as a first pass on a shoe is very different than a 13th regarding questions and standards.

Step 2: Workout Selection and Intensity Ramps Up
After I’ve made my initial comparison notes, I’ll then start pushing the intensity in the shoe that I’m reviewing. This is where quality and dialed-in programming comes into play.
If I had to guess, I would wager that most “shoe reviewers” aren’t building training programs designed around their footwear. As a strength coach, this is where I have the most fun because I get to put my product reviewer and coaching hat on to build training blocks.
To elaborate, since I review weightlifting, barefoot, and cross-training shoes, I have to be super selective with the workouts I’m doing based on the shoes I’m reviewing.

Let’s say I have a week where I’m testing all three types of shoes. In this case, I’ll build different workouts for each style of footwear based on how it’s designed to be used.
Below is a breakdown of my normal training week with shoe reviews,
- Monday: A1. Jerk (weightlifting shoes), B1. Walking Lunges (cross-training shoes or barefoot shoes), C1-C3: MetCon (cross-training shoes).
- Tuesday: A1. Power Clean (weightlifting shoes), B1. Leg Press (weightlifting, cross-training, or barefoot shoes), C1. Run With Sprint Focus (cross-training shoes or running shoes), D1. Dumbbell RDL (barefoot shoes)
- Wednesday: Upper Bodybuild Day (barefoot or cross-training shoes)
- Friday: A1. Dip Clean (weightlifting shoes), B1. Clean (weightlifting or cross-training shoes), C1. Front/Back Squat (weightlifting or cross-training shoes), D1-D2. Skater Strides/Box Jumps (cross-training or barefoot shoes)
- Saturday: A1. Deadlift (barefoot shoes), B1. Trap Bar RDL (barefoot shoes), C1-C4: Upper Accessories (barefoot or cross-training shoes).
On my off days, I’ll also typically wear barefoot or cross-training shoes to assess their comfort for walking and all-day wear as I typically walk around 10-15k steps a day with our dogs. If I do recovery runs on these days, I’ll wear running shoes.

If the above seems a little OCD and over-analytical, arguably it is. However, since I’m the main one reviewing shoes on That Fit Friend, it’s imperative to build my weeks around reviewing different shoes to ensure I cover all of my bases.
I’m a big believer in the idea that a good comparison or round-up should come from the same person. When you see shoe round-ups written by authors who haven’t worn every shoe they’ve included, I always wonder,
“How does that make sense and how do they have that nuance/context without the first-hand experience”?
By rotating my footwear and outside of review reasons, I also get a nice passive benefit of exposing my feet and ankles to different ranges of motion and stressors, which I’m big on and encourage everyone to explore.

Every week typically looks the same with my training with an ebb and flow of things like running and strength volume depending on my training focuses and the volume of shoes I’m working with.
If I have more weightlifting shoes in the queue, then I’ll increase things like my squat and clean & jerk volume. Conversely, if I have more cross-training shoes, then I’ll increase how often I tackle CrossFit WODs and MetCons.
Every shoe I review typically receives anywhere from 8-10 hard training sessions before building out review content on them. I’ll then wear most models after a review is published so I can make updates accordingly (more on that in Step 4 below).
Step 3: Content Starts to Get Formulated
After enough training sessions to where I feel confident in my notes and thoughts on the shoe I’m testing, I start to build out the content that is going to accompany the shoe.
For every shoe review, I typically try to build an in-depth article with a YouTube video. Why? I like coupling the two because it helps provide even more visuals into how I’m testing shoes and gives depth into what I’m doing in the shoes.
I’ll typically write articles first, then build out videos second and this is because I use articles as a loose script for the video. Plus, I regularly update articles to reflect changes in a shoe’s performance and that’s tougher to do in a YouTube video.
So, by building an article first, I give myself a little bit of a runway to solidify points before putting them into video format. I also like building both because I can cover more topics that I may miss if I’m only building one thing.
For context, there have been occasions where I miss a drawback with a shoe due to it breaking after a few months of tough wear and after I’ve published a video, so an article is an awesome tool to make additional notes on this change.
Another benefit of building written and video shoe reviews is that videos are typically a much easier way to engage with the community. This is fantastic because it helps provide even more context on a shoe’s overall performance.

At the end of the day, I’m just one data point and so by having a dynamite That Fit Friend community, you can typically get a really great picture of a shoe’s overall abilities in the comments section of my review videos.
Step 4: Update, Update, and Update Some More!
Updates are the real goat of any great piece of content, whether it’s a shoe review, a piece of training content, or just a personal piece of content. Why are updates the undisputed goat, in my opinion?
They highlight growth and change.
A great update can help paint the picture of a shoe’s long-term durability. Plus, they can highlight how I’ve changed regarding my interpretations of a shoe’s performance.

Not every shoe is an “instant hit” when you put them on your feet and on multiple occasions shoes have taken WEEKS to grow on me before I came to appreciate them.
A great example of this is the UA Reign Lifter, Under Armour’s first weightlifting shoe. My first impressions of this model were very so-so, and I wasn’t the biggest fan.
However, after multiple sessions, I came to really enjoy this shoe and its overall performance. This is why updating content is incredibly important because it adds nuance and depth to a shoe’s potential and shortcomings.

Whenever you see things like “2023, 2024, 2025 Update, etc.” on my individual review this typically signifies that I’ve updated my pros, cons, and performance thoughts with a shoe. Sometimes you don’t realize things with a model until after months of wear.
For round-ups, a time-focused update is coupled with additional thoughts on models listed, it can also mean models have shifted in places, and it means that new models have been added.
Wrapping Up
As the sole owner and core content producer on That Fit Friend, I always want to make sure I’m giving you as much context as possible. I think this has to do with my coaching and training background and my natural love for nuance.
In a world of review content that is constantly getting more and more money-driven, I want That Fit Friend to be a haven for honest reviews by a guy who’s buying all of the gear he’s testing.

I also want That Fit Friend to serve as a platform for communication between yourself, the reader, and myself because, at the end of the day, one of my main goals is to help you find the right pair of shoes for YOUR needs.
Before I wrap up my ramblings, a few promises that you can expect with That Fit Friend include,
- I promise to never mislead you into buying something you don’t need.
- I promise never to take money from companies for reviews.
- I promise to never award a product a higher placement because of an under-the-table higher affiliate payout (this happens more than you think with media companies).
If you have additional questions on any of the above, feel free to reach out here, on YouTube, or on Instagram (@jake_boly or @that_fit_friend). Also, if you’ve made it this far, thank you and I appreciate you rocking with That Fit Friend.


Add a Comment