
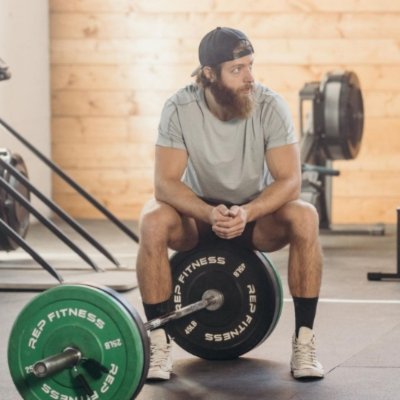
How-To Deficit Deadlifts Quick Explainer
- Set up something to stand on and elevate your feet from the floor. Generally, I aim to do deficit deadlifts from a 2-4 inch surface, think 25 lb or 45 lb plate.
- Make sure your feet are centered on the elevated surface you’re using and the barbell is over the midfoot when getting into your set position.
- Grip the barbell as you normally would and set the hips. Your knees will likely be more bent with this variation — that’s okay.
- Brace and pull the weight as you normally would working to keep the hips and knees timed properly.
- At the top, lock out the weight then start the descent like you normally would. Ideally, you want the barbell to end up in the same position it started.

Want to build your deadlift? Try running my Push Pull Monster program. This program is designed to increase your deadlift 1-RM. I also have 10+ programs to choose from for just $9.99 a month with no monthly commitment!
Deficit Deadlift Form (Longer Coaching Explanation)
I’m a strength coach that loves details and if you’re similar, then you’re probably curious about some of the nuances that come with deficit deadlift. Below is a longer explainer for this exercise.
Step 1: Set Up Properly
Coach Jake: One of the biggest players in getting the most out of your deficit deadlifts is selecting the right elevation to lift from. This can dictate the intensity in which you can train and can shift the goals of this exercise.

- For beginners and lifters working heavier, I usually suggest starting with a 2-inch elevation or 25 lb plate to start. This can help you ease into deficit deadlifts while working with greater intensity. Lower elevation, smaller form changes.
- For intermediates and lifters wanting more quad, I usually program a 4-inch elevation or a 45 lb plate. This will create more knee flexion which will translate to more quads during the first portion of the pull.
Even if you’re an intermediate, if you haven’t done deficit deadlifts in a minute, I’d suggest starting with a 2-inch elevation and then working to a 4-inch elevation after about three weeks.
Step 2: Focus On Controlling the Lift
Coach Jake: With the deficit deadlift, we’re purposely setting ourselves up in a disadvantaged position. In layman’s terms, a deficit deadlift is going to challenge us more than a traditional deadlift from the floor will.
This is due to the elevation changing our hip and knee mechanics. We’ll get more knee and hip flexion with deficit deadlifts so timing the pull and fighting to maintain position can be tougher in this variation.

For this reason, I typically suggest most lifters use a 2-3 concentric when programming deficit deadlifts. This will help you feel the timing change of the hips and knees.
Since the knees are in a deeper degree of flexion, we can sometimes see the hips shoot up too quickly which is a common mistake I see in most deadlifts. Slow down to perfect the form change that will come with deficit deadlifts.
Step 3: Drive the Feet Through the Floor
Coach Jake: Since our knees are in a greater degree of flexion we have an awesome opportunity to double down on the effort our quads are putting into the lift. In my coaching opinion, most lifters underutilize their quads in the deadlift — it’s not a posterior-only lift.
Once you’ve set up like normal and the barbell is over the midfoot and you’re centered on your elevated surface, brace and start to lift and drive the feet through the floor. I love using the cues, “Pretend you’re on a leg press,” or “Push the earth away.”

Focus on keeping the knees and hips timed so they’re moving at the same pace. You do NOT want the hips to shoot up and then finish the lift. Focus on maintaining a balanced pull with the hips and knees moving simultaneously.
This is going to feel more challenging than your normal pull because you’re going to have to fight to keep the bar tight to the body while timing your joints accordingly.
Step 4: Lock Out and Control the Descent
Coach Jake: At the top, lock out your lift and think about driving the glutes to the barbell. Ideally, the bar will stay tight to the body so you feel balanced at the top even though you’re standing on something elevated.
As a general rule of thumb, if you’re feeling forward then you might not be fully extending the hips at the top and if you feel like you’re leaning back then you might be extending too much at the lower back.

When you start your descent, think about breaking at the hips and then the knees. I typically suggest starting at the hips first since you’re on an elevated surface and your timing will be different from the normal deadlift.
If you do this properly, the barbell should end up around the same spot it started in. Think as though there are two planes of glass in front of and behind the barbell and your goal is to keep the barbell between them to avoid shattering the glass.
This is also key for sets where you’re doing a lot of reps and fatigue starts to set in. The last thing you want is to reset and adjust your starting position when you’re gassed on rep 7.
Deficit Deadlift Mistakes
If you’re not working with a coach, then you’ll want to video your first sets of deficit deadlifts to make sure you’re not making mistakes that can sabotage your gains and progress.
Deficit Deadlift Mistake 1: Rushing Reps
The biggest deficit deadlift mistake that I see lifters make is rushing their reps. This is a problem that I also see with traditional deadlifts but it becomes more apparent once you start to pull from a deficit.
A saying that I love to tell my clients and friends who ask me for deadlift help is,
In the deadlift, there’s power in slowness.
For a big deadlift, slow doesn’t necessarily mean a lack of power. Your power is going to come from maintaining strong positions that are leveraging your muscles and joints to their best abilities.
If you can fight to maintain strong positions when starting your deadlift, then you’ll get more out of your quads when breaking the floor and from the hips as you start to pull the weight past the mid-shin.
When in doubt, add a tempo and video yourself. You want to see the hips and knees moving simultaneously when starting your deadlift and focus on driving those feet through the floor to initiate your pull.
Deficit Deadlift Mistake 2: Setting Too Much Deficit Too Fast
Another mistake that I see lifters make all of the time with deficit deadlifts is using way too big of a deficit right out of the gate. If you go from pulling from the floor to a 4+ inch deficit then you may find it more difficult to ramp up faster.
The deadlift is a game of inches and when we change our setup, we have to keep that in mind. Every inch added to a deficit is another degree of form that will change that we’ll want to keep an eye on.

When in doubt, start with less and work your way. Start with a 25 lb bumper plate, then move to a 35 or 45 lb plate depending on your comfort and prowess with the form change that’s needed to be efficient with deficit deadlifts.
Frequently Asked Questions (FAQ)
Q:What does a deficit deadlift do?
Q:What are the cues for deficit deadlifts?
Q:What percentage should you do deficit deadlifts at?
Takeaway Coaching Notes
When you’re starting to use deficit deadlifts in your workout program, I’d highly suggest easing into them regarding the amount of deficit you’re using.
Deficit deadlifts can be powerful tools for building your strength off of the floor, biasing the quads to have more carryover to your traditional deadlift, and focusing on the timing of the hips and knees.
If you have additional questions about this exercise or need help with your form, drop a comment below or reach out to me via Instagram (@jake_boly or @that_fit_friend).


Add a Comment