
Expert Verified By: Austin Current, CSCS, CISSN, Author and Strength Coach
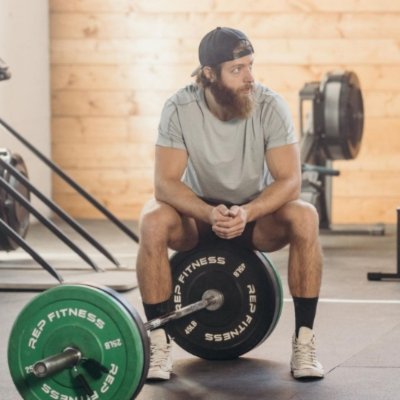
I love the deadlift. In fact, I recently just deadlifted a 585 lb PR and followed that up with a sub 2-hour half marathon. Yeah, that’s right, I love the deadlift so much that I maxed mine out before running 13 miles.
To me, the deadlift is like playing the violin. It takes practice to be proficient with perfect deadlift reps, and it takes time, concentration, and relentless to build a resilient body to pick up massive amounts of weight from the floor.
How To Properly Deadlift
Step 1: Establish your stance
The first step of completing a beautiful deadlift rep is establishing your stance. For conventional deadlifts, you’ll generally want your stance to be just about hip-width apart and you want your midfoot under the barbell. Think, “Barbell cover laces”.
This width is typically ideal because it allows you to better leverage your quads when lifting the weight. By doing this, we’re essentially creating a better “stacked” position with the legs to get more quad when extending and picking up weight.

There can always be some variance in your stance width compared to your peers and that’s normal. What’s most important is that you’re using a stance that is comfortable for you and allows you to feel strong and balanced when pulling.
Step 2: Grip the barbell
After you’ve established a strong stance, you’ll then want to bend down and grip the barbell. Your grip width should always reflect your stance width as these two play off of one another.
I typically use the cue of keeping a “light” touch between the outsides of the knees and the insides of the arms. This will usually result in the arms being in an advantageous position without knocking the knees in.

Ideally, we want a grip width that allows us to have “long arms” or arms that are relatively perpendicular to the floor. This will result in stronger deadlifts as we’re leveraging the arms better.
This will ensure we have more surface area with the hands to grip the barbell since the hands are directly over the bar.
Step 3: Hinge and set the back
Now that you’ve gripped the bar it’s time to establish arguably the most crucial point in your deadlift and that’s your hip position. You want the hips to be in a position that allows you to create tension through the posterior while also leveraging the quads.
If you’re brand new to deadlifting and trying to figure out your hip height try this out, “Bend down and grip the barbell with a cat-like posture without moving your knees.
Once you’ve gripped the bar, bring your shins forward and hips down until your shins hit the barbell, once they do stop.”

If you’ve done this correctly, then your shoulders should be over the barbell or in front of it. This will depend on your anatomy. Shorter lifters will typically stay over the barbell more and taller lifter/lankier lifters (like me) will have the shoulders more forward.
To add more depth here, don’t be afraid to bring your knees more forward to align with your hip position as this will give you more quad off of the floor. A common mistake that I see lifters constantly make with their deadlift positioning is keeping the shins far too vertical.

Much like the shoulders, taller lifters will have a more forward-translated shin position whereas shorter lifters will have less dramatic angles here.
Step 4: Pull the slack out and lift
You’ve mastered your stance, grip, and starting position, now it’s time to pull the slack out of the barbell and lift AKA the fun part. Pulling the slack out entails creating tension with your body through the floor and barbell.

To do this properly, you’re going to pull up slightly on the barbell and produce tension throughout the body. If I were in-person coaching you, I should be able to nudge you while you’re pulling the slack out and not completely shift your position.
With the slack pulled out of the barbell, brace and start to lift the weight off of the floor. Your brace should reflect the intensity you’re using. Heavier loads will require a larger focus on the brace you’re creating.

Keep the barbell tight to the body and as you pull think about pressing the feet into the floor. A cue I love to use is, “Press the earth away.” This will help you leverage the quads in tandem with the hamstrings, glutes, and back muscles.
Step 5: Lockout and repeat
Now that you’ve crushed your setup, creating tension, and pulling it’s time to lock out your deadlift. As the barbell passes your thighs and reaches your hips, you’re going to stand up vertically the lock the weight out.
I like to use the cue, “Bring the glutes through the barbell and squeeze.” This cue is great because it can help you not overextend the lower back when locking out (if your glutes are contracted, you can’t hyperextend) and it can serve as a cue for a completed rep.

Need help with improving your deadlift? I have two deadlift programs available in my TF2 Strength App. These programs will build your deadlift and back!
Deadlift Muscles Worked
The deadlift is an awesome exercise because it can train a wide range of muscles and it’s often referred to as a full-body exercise. When deadlifting, you’ll have a wide range of muscles working to help you complete reps.
 What Muscles Do Deadlifts Work?
Deadlift Muscles Used

- Quads
- Hamstrings
- Glutes
- Core
- Forearms
- Traps
- Lats
- Erectors
*bolded indicates a higher level of involvement
In the context of muscle hypertrophy, the deadlift can work when the goal is to train a wide range of muscles. It can also work well for advanced lifters like bodybuilders wanting to build their posterior.
That said, for most lifters if your goal is muscle hypertrophy of specific muscles you may want to find movements that are a little more isolated and focused for your hypertrophy goals.
Fixing the Hips Shooting Up In the Deadlift
One of the biggest mistakes that I see lifters make with deadlifts is letting their hips shoot up. Hip shoot in the deadlift is typically the result of poor hip positioning and tension creation.
At heavier weights, deadlift hip shoot can be more problematic because it will typically pull you out of position before you even “break the floor” (start your pull) and will put unnecessary stress on now disadvantaged muscles (most often, the erectors).
How To Fix Hip Shoot
If you find that your hips are shooting up in the deadlift, then you’ll want to try adjusting two things. First, bring your hips up a bit. Generally, if a lifter is experiencing hip shoot then they’re simply sitting too low.

If this is you and you want to address the root cause, then you’ll want to video yourself from the side and look for two things.
- Knee and Shin Angle: If your knee and shins are flexed like a squat then there’s a good chance you’re sitting too low in your setup.
- Shoulder Position: If your shoulders are behind the bar then you’re likely sitting too low and behind the bar which is when you’ll see the “stripper hips” during deadlifts.

Another awesome tip for fixing hips shooting up in the deadlift is to utilize a tempo when lifting the weight. A tempo can help slow you down and make you more conscious of your hip position so you can more easily adjust during reps.
When Should I Switch My Deadlift Grip?
In the deadlift, there are three grip styles lifters will use based on their goals and preferences. The three most common types of deadlift grips include double overhand, mixed grip, and hook grip.
For most lifters, I suggest switching their grip once the weight on the bar exceeds what they can hold with a double overhand grip. Basically, once your grip starts failing and your form starts changing that’s a good time to switch your grip.

I typically suggest that lifters avoid using their most secure grip method until they need it. If you can use double overhand for your warm-up sets then you can passively build grip strength without missing out on your programmed intensities.
How To Improve Deadlift Grip
If your goal is improving your deadlift grip, then my main piece of advice is to keep it simple. Grip strength in the deadlift is specific and it’s a skill at the end of the day. Below are three of my favorite ways to improve deadlift grip strength.
- Use double overhand for as long as you can until your set’s weight exceeds what you can hold.
- Program a double overhand block or two.
- Hold your sets longer at lockout. Think 2-5 seconds to give you more exposure holding heavier weights.
- Try using different grip styles. For example, you may find a grip style like hook grip works better for you from a top-end security context.

When Should I Put a Belt On for Deadlifts?
The topic of wearing a belt for deadlifts can be pretty nuanced at times and it’s a topic that is multifactorial. Below, I’ll provide my coaching suggestions but please keep in mind this isn’t the only way to approach belt usage for deadlifts.
From a top-down point of view, I always suggest wearing a weightlifting belt when the weight on the barbell exceeds what you can comfortably lift without deviating from your goal torso position a ton.

Essentially, if the weight on the bar is causing your torso to flex a ton or putting additional stress on the lower back then it’s likely a good idea to use a belt. This does not mean you should be wearing a weightlifting belt for every single set, especially lighter sets.
At the end of the day, if your goal is moving more weight then a weightlifting belt can be a useful supportive strength tool for helping you maintain better form and it can help you perform better because it can facilitate better bracing mechanics.
Frequently Asked Questions (FAQ)
Q:Are deadlifts more back or legs?
Q:Are deadlifts necessary?
Q:Can deadlifts hurt your back?
Takeaway Thoughts
The deadlift is an exercise that I think everyone should familiarize themselves with and it’s a fundamental movement pattern. With so many different variations, there’s likely a deadlift that aligns really well with your goals.
While I personally love barbell deadlifts, it’s not an exercise that everyone needs to perform for every single training block. For example, trap bar deadlifts, Romanian deadlifts, and stiff-leg deadlifts are all awesome variations to explore, too.
If you have additional questions about deadlifts, drop a comment below or reach out to me personally via Instagram (@jake_boly or @that_fit_friend).


Add a Comment